Version 6
 

THE
BASICS
OF
CONSTRUCTING
A
BLACKBOARD
SITE

The Button Menu
The Control Panel
Posting an Announcement
Staff Information
Creating and Managing Folders
Entering Text
Optional File Uploads (Word, PDF, etc.)
External Links
Using Email within Blackboard
Posting Discussion Board Items
Collaboration Tools (Chat)
 
Click on the topic in the list above to move to the instructions for the topic.
This short instruction manual covers the basics of Blackboard. A complete manual in PDF format is available to download in the Course Content area of the site or by clicking HERE.

The Button Menu
The basic navigation tools for Blackboard are always visible to the user. The class will open to the Announcements portion. You have the choice of having the Announcements show for two weeks or during the life of the course.
Course Information is the general area where the syllabus is posted. The program allows for a very simple syllabus to be entered including the course goals and objectives. You can also post a broader, more comprehensive syllabus as a document.
Staff Information will allow you to post your name and contact information, as well as a picture if you so desire.
Course Documents is the source area for most of the teaching and learning materials for the site. These can be downloadable files or web formatted materials. More will be said later about how to divide these postings so that they are easy to navigate.
Assignments can be used for quiz features and posted assignments.
Books can be used to list textbooks for the course or suggested readings.
Communication is the area where mail, virtual classroom (generally referred to as chat), groups, and asynchronous discussion board activities take place. The menu for the Communications Center is shown below.
The buttons below Communication will take you directly to the same communications tools of Virtual Classroom, Discussion Board, and Groups.
External Links is the place where you can direct your students to preselected links that support the educational activities of your course. These links will show within your course and leave the navigation buttons showing.
Student Tools allow your students to check their grades if you use the grading tools within the program.


The Control Panel


We will start with Control Panel. If you look at the area below the buttons, you will see a gray colored button labeled as Control Panel. This control panel will allow you to access all areas of the course for posting information and modifying information. You, as the instructor, see this button when you logon the program, but your students do not. Included is the ability to modify just which buttons your students see, count how many times they access different postings, and much, much more. Most of the features are self-explanatory so you can freely explore the features and modify to fit your needs. In the balance of this tutorial, we will cover some of the very basic features. If you once learn to post information in one area, the interface and steps are very similar in other areas.

Please note that you can adjust the style and number of buttons. If some do not apply to your course, you can remove them. In the control panel, go to Settings/Course Design/Course Design. Follow the directions on the page.


The Control Panel is divided into six sections. For our purpose, in the basics, we will be concerned with only the Content Areas and the Course Tools sections. You will be referring to this graphic frequently throughout this instruction.


Posting an Announcement

You are about to learn how to enter text directly into Blackboard. Once you have learned to do this in the Announcement section, you can use the same process to enter text in many of the other functions. The process is identical.

To arrive at the area where an announcement can be posted, select the Control Panel button and then under Content Areas, select Announcements. This will open a menu as seen below.


To add an announcement, click on the Add Announcement button in the upper left corner. This will bring up the screen pictured below.


Place your cursor in the Subject line and type in the subject of the announcement. In the Message section, either type directly or use cut and paste from an existing document to enter the text.

Once you have entered the information, you have other additional choice in section 2, Options, pictured below.


If you check the box in front of Always Show Announcement on Main Page, it will do exactly that. This is good for general directions you want to always be available. If you don't check the box, the announcement will disappear from student view in two weeks, but still be retrievable. You can also use the restricted release information to post an announcement in advance, and have it appear and disappear on specific dates. In part 3, Course Link, you can insert a hot link directly into the announcement that will send the student to that location. Once you have the information entered, select Submit under section 4. You will receive confirmation that the information is now available.


Near the top of the screen you will see a list of locations within Blackboard separated by greater than ( > ) signs. These are called Breadcrumbs and allow you to jump back to an earlier level or previous screen. If you want to see what this announcement will look like to your students, click on the number of the class. In this case, you would click on EDU586-1-S02 to go to the student view, and CONTROL PANEL to continue adding or changing documents.

Related to posting an Announcement is changing an Announcement if you discover you have made an error and want to correct it. You may no longer need the announcement and wish to delete it. Use the Control Panel button and then under Content Areas select Announcements. This will open the same menu as where you saw the posting directions, along with the announcement you have posted. Next to that announcement you will see Modify and Remove buttons.

 
Each announcement you post will have two options - Modify or Remove. Click on your choice. If it is modify, you can make your changes and then press the submit button to post the changes. If you select remove, you will have one option to confirm the choice before the item is removed.


Staff Information
Once you have mastered this section, you will find the Staff Information very similar to posting announcements. You can type in the information in the categories and then click on submit. If you elect to post a digital photo, you should limit the size to about 100 pixels square, which translates to about 1.5 inches square. If the picture is too large, it will distort the proportions on the page.


Creating and Managing Folders

You are most likely already accustomed to placing the documents you create on your hard drive into file folders to better organize the materials. Blackboard offers you the same option, with one big difference. On your hard drive, you create several documents. You decide they should be in the same folder. You create the folder and move them into the new folder. No problem... this strategy works fine on the hard drive. It does NOT work in Blackboard. You need to establish the file folders FIRST, before you move documents to your site. Once there, the only way to get them into a folder is to remove the document, create the folder, and then place the document into the folder. There is no simple way to move it once it is on the server.

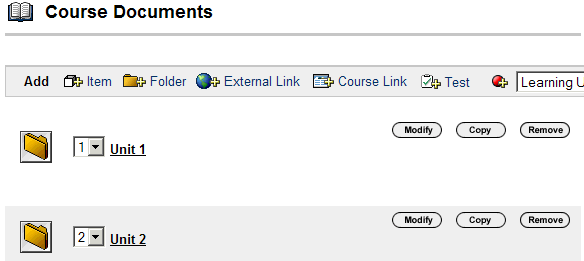
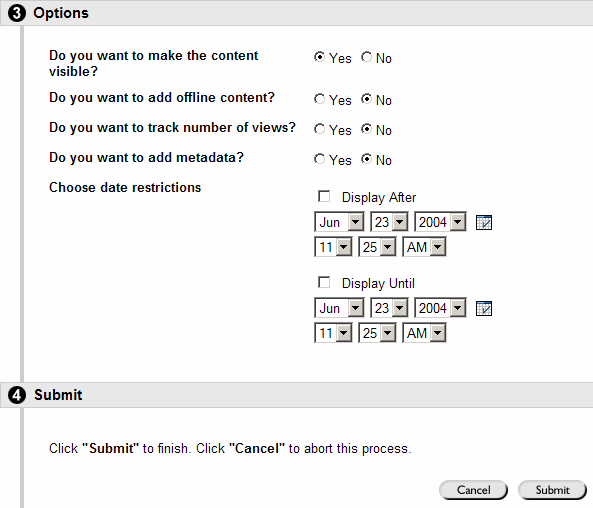
Thus creating FOLDERS FIRST, you new mantra, is extremely important. You can rename them and reorder them once they are posted, but they must be posted before you put documents into the site. You can even nest folders within folders if you so desire.

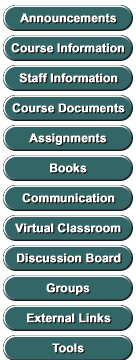
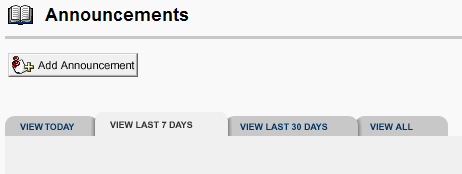
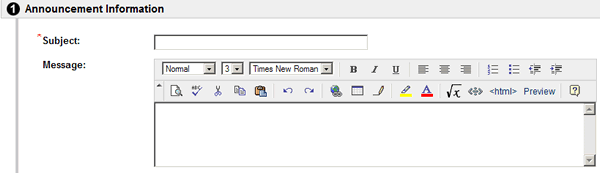
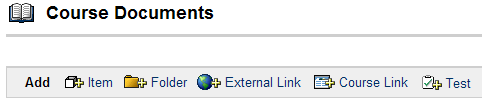
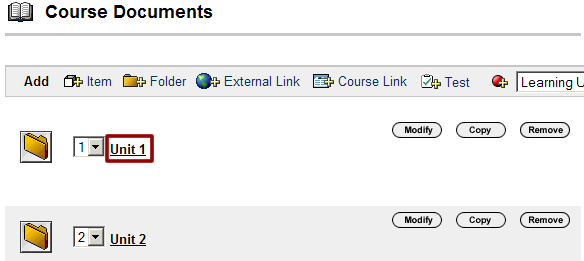
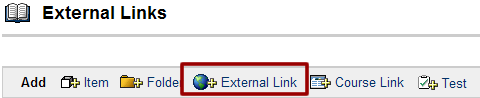
In Course Information, Course Documents, Assignments, Books, and External Links provide the option to create folders, and all work exactly the same way. The example below is from the Course Documents option, but all look the same.

To create a folder, click on Folder. You will see a new menu present itself on the screen with several options.


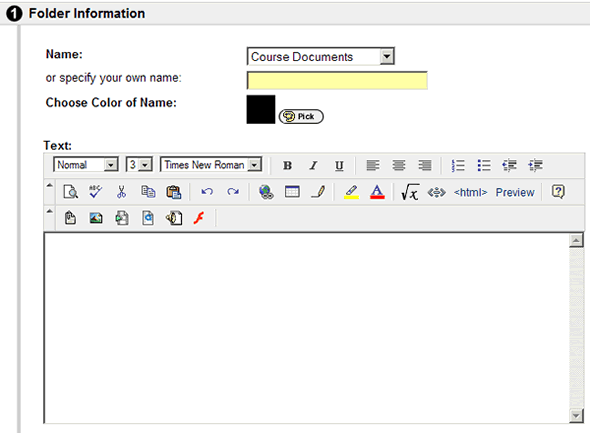
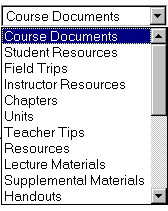
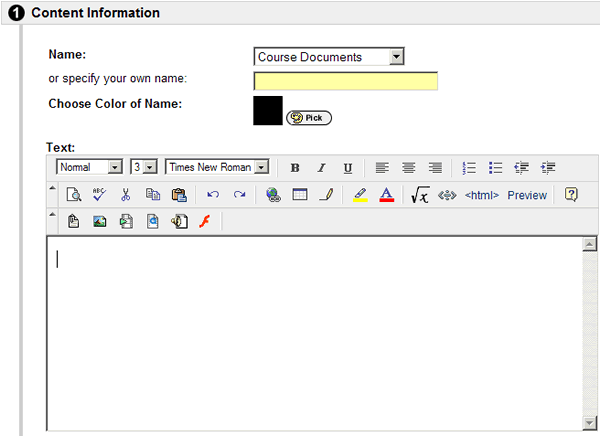
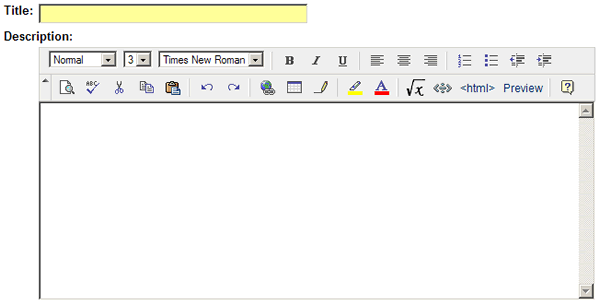
You can name the folder using the default names, or create your own. If you click on the down arrow next to Handout, you will see several options, including Other - Insert Text Below. If you select this option, type the name you wish in the box below where you made the choice. If you decide later that you wish to rename the folder, you certainly have that option available to you.

You can also select the color of the title for the folder by clicking on the Pick option next to Choose Color of Name. You will see a palate of colors. Highlight your choice.

Under Text you can add additional text to better describe the materials in the folder.
Under Select Options, you can make the folder immediately available to your students (this is the default), or select NO to hid it from their view until such time as you want them to use the contents. This is helpful as you work ahead on upcoming units or chapters. You can also use the date/time options to have the document release and disappear at selected times.
Don't forget to click SUBMIT in the lower right hand corner under 3 to create the folder. You can repeat this process to create additional folders. You will note that when more than one folder is in an area, the option to reorder them appears before the name of the folder. From this view you can also Modify or Remove the folder. Note that folders must be empty in order to remove them.

Copy a folder is new in version 6. This will allow you to move an entire folder from one area to another within your course.


Entering Text

Most likely, you will want to post text documents within the folders you just created. To do this you must open the folder first. If you created two folders called Unit 1 and Unit 2 within Course Documents, the following is what you would see on your screen once you selected Course Documents from the Control Panel.

To enter the folder, click on the name for the folder. In this case, you would click on the underlined Unit 1 to open the folder (see red box). Once the folder is open, at the top of the page you will see the options to add an item, a folder, or a learning unit, similar to the ones you already learned about when you covered Posting Announcements. It will look like the menu below.
Click on Add Item. This will bring up the menu below.

You can type directly into the Enter Information Below area, or use a cut and paste method from an existing document. Don't forget to click on the SUBMIT button located in the bottom right corner of the page. You may need to scroll down the page to see the button.


Optional File Upload

There are times when you will want to place an entire document as a saved file on the site. These files can either be opened on the server or downloaded to the student's computer to open. You should be aware that in order for a student to view the document, the student must have the same program on their computer as the was used to create the document. Thus if you create a review document in Word, the student will only be able to open it if Word is on their computer. The same is true for viewing PowerPoint presentations saved as a file. Without PowerPoint on the student's computer, the file cannot be opened.


The title you selected in section 1 will be used for this upload, so you do not see an opportunity to name it under section 2. In section 2, use the Browse button next to File to Attach: to navigate to the correct file on your computer's hard drive. Once you select it, the computer will write in the path to that file so that it can be uploaded to the server. Under Name of Link to File you have several options. You can indicate the type of file as the program suggests. You can type in Click Here to Open in order to provide directions to your students. You can also leave it blank. Under Special Actions, select the default, Create a link to this file.

The Options defaults are satisfactory for most uses. You may want to select Yes under tracking contents usage (second option listed). This will track which students and how often they refer to this particular document. You also have the option to release the content on a specific date. When you have selected your options, press SUBMIT at the bottom right of the screen.

After you create a file, go to your course and test it to make sure it either opens or can be downloaded. This is a good practice when posting anything to your site to confirm that it does work as intended.


External Links

Posting external links to other web sites is quite simple. As in the organization of any instructional resources in Blackboard, you may wish to place related materials in the same folders. This will require you to create the folders first, as in other parts of Blackboard. Once in the folder, you can place the link and a description of that link.

From the control panel, select External Links. You will see options similar to all the other areas. Like the other sections, folders must be added before you can place items into them. Once an item is placed as an item, you can not move it to a folder. Folders add in the same way they do in the Course Document section.

If you select Add Item, the form shown below will appear. In the yellow box, place the name of the site, not the URL.

Place the URL in the correct blank. The easiest way to make certain that you have all the information for the URL of Link correct is to go to the site on the web and copying the URL from the address bar. This can then be pasted into the blank. You must have the http:// as part of the URL address. In the larger white area, you can place some descriptive narrative about the site.

Option 2 on this page would allow you to link another document to this URL. It might be a worksheet in Word that the student would complete for the site visit. You may leave this area blank.

You can prepare these links before a chapter or unit is assigned and hide them by selecting No in the "make the link visible" choice in section 3, Options. If you wish you can force the site to open in a different browser window by selecting Yes under External Window. If you stay with the default No, you will have the information showing within a window in Blackboard. For most sites, the default option will work just fine. Make sure you click submit when you have entered all the information.


Using Email within Blackboard
Blackboard's email function utilizes the email account of the student rather than creating a new one within the software. The only trick to making it work is to be certain your students have entered their correct email under their personal information. We enter the information we hve when we do the initial data base population from Banner. This will not auto update with any changes the student makes in Banner. The change must be made here. Without accurate information, messages cannot be delivered. Students can check their email address and update it under Student Tools. If you intend to use the mail feature, please let your students know you need an accurate email address in their student profile in Blackboard.

The email client in Blackboard works in the same manner as most email programs. To access the site you select the Communications button rather than entering the Control Panel. You will see a menu similar to the one above.

Click on Send E-mail. Select the user or group you wish to include in the message. If you select Select Users you will see a check box menu similar to the one below under section 1. Check the box or boxes of the appropriate receiver of the email message.

In number 2, fill in the subject and the message as you would do in any other email program. In number 3, you have the option of attaching a document much as you would in any email program. When you are done, don't forget to click Submit to send the message.

Option 3 will allow you to copy the message to yourself. This is important if you wish to keep a record, since there is no sent box as you would find in Outlook or Outlook Express. If you wash to use an attachment, click the Add button under option 4 and follow the indicated steps. In order to send the message, your last step is to press Submit.

Once sent, the email will show up the the student's regular email box at Yahoo, MSN, Hotmail, or any other email service provider. Their response will be sent directly to the email account you listed under your own personal information.


Posting Discussion Board Items
One of the most powerful tools in Blackboard is the Discussion Board. Here you can post topics for asynchronous discussion among your students. Each posting is available to all the other members of the class. They can post their own thoughts on the question, or respond to the thoughts of their classmates. It is like a classroom discussion, but done over a period of time.
As the instructor, you can establish the topics and monitor the comments. This is one option that you do not access through the control panel. In the button list on the left side of the screen, click on Communication and then Discussion Board, or just click the Discussion Board button to go directly to the discussion board . The menu below will be visible if you select the Communication button..
Once you select Discussion Board, you will see the menu below.
Click on ADD FORUM. You will next see the screen below.

Once you enter a title and a description, you can elect how to allow responses in the Forum Settings area. The defaults are listed above. By allowing new threads, the students will be able to start and post topics of their own.


You may add or restrict the privileges of the students in the class. Highlight one of the names, and then select the option from the four choices. By default, the instructor is the Administrator, and all the users are Normal, with rights to post and answer in the Discussion Board.
Reading the threads requires you to go to communication, click on the forum topic, and then on the postings. You can respond to them after reading. Your response will show indented in the list of responses.

Collaboration (formerly called Chat)

To use the Collaboration tools, go to Communication and click on Collaboration.

By default, there will already be two rooms established.

The Lecture Hall is the main area. Office Hours is a light chat client with fewer bells and whistles. Clicking on Communication and then Collaboration will get you and your students to these two existing rooms. To join one of the sessions, click on the Join button.

If you wish to add additional rooms, go to the Control Panel and click on the Collaboration link. To start the process, click on Creat Collaboration Session at the top of this page.

By default, the session will come up with a name based on the course number. You may change that to any name you want. If the room is being established for small group work, you may want to name it by team number, etc. In section 2, you can specify dates when it will be available. If you unclick End After, the session will remain active throughout the course. In 3, select the type of chat room, and don't forget to click Submit at the end.

One word of caution. Collaboration requires Java to be enabled. The links once you select Join will walk you through the steps of installing Java if they are not already present. In the vast majority of cases, Java will be already present.

This short instruction manual covers the basics of Blackboard. A complete manual in PDF format is available to download in the Course Content area of the site or by clicking HERE.