1. Using
Firefox (go to Firefox.com
to download for free if you do not already have it), go to the old
system (https://online.cui.edu)
and into the
course that contains the information you want transferred.
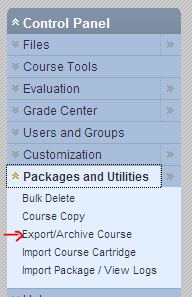
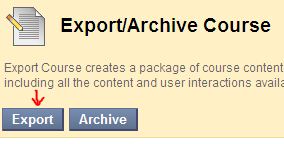
2. Under
Control Panel, go to Packages & Utilities,
Export/Archive Course, and then click the blue Export button.
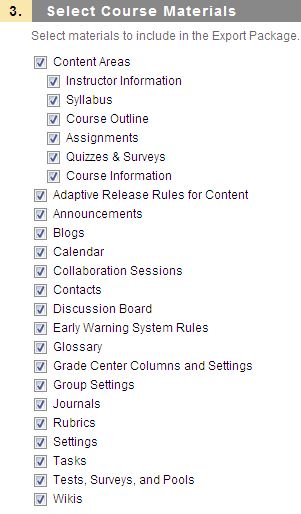
3. Skip to
step 3 Select Course Materials and put a check in the
boxes that contain the material you want transferred. Click the Submit
button.
Look for the green success bar at the top of the screen. You will
receive an
email when the export file is ready. This can take awhile depending how
much
information is being transferred.

4. After
receiving the email, go back into the old course to the
export area (Control Panel, Packages
& Utilities,
Export/Archive Course) and you
should see an Export zip file listed. If you do not
see
this file, you will need to refresh the screen (click the refresh
button on your browser or log out of Blackboard and then back in again).
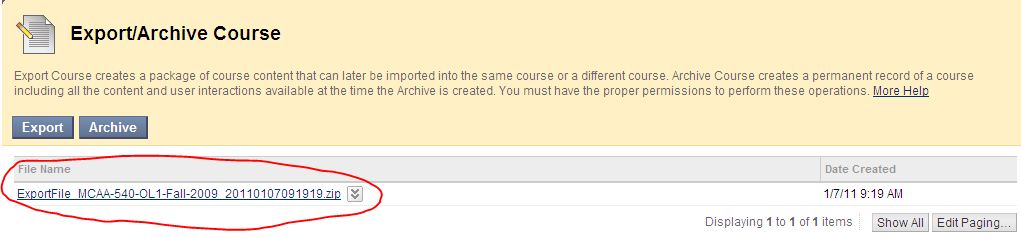
5. You will
then need to download this export zip file to your local computer. To
do so, click on the name of the export file that is listed (above ex.
ExportFile_MCAA-540_OL1_Fall…zip file) and choose the Save File option.
This
will save it to your Download folder if you are using Windows 7. If you
are
using any other OS, Firefox will display a download window showing that
the
file was successfully downloaded. Right click that file and choose Open
Containing Folder to see where the file is saved. You are NOT opening
the zip file itself, just the location where it is located (do not try
to open the zip file).
6. Log into
the new system (cui.Blackboard.com)
and enter the new
blank course shell where you want the information to end up. Remember
that your new course shell is already created for you, it just does not
have anything in it.
7. Got to
the
Control Panel, then Packages & Utilities, Import
Package / View Logs, and click the blue Import Package button.
8. On step
2.
“Select a Package”, click the Browse button to find the
Export…zip file you saved on your computer.
9. On step
3.
“Select Course Materials”, put a check in all the boxes
that indicate what course materials you want transferred and click the
Submit
button. Look for the green “Success: This action has been queued. An
email will
be sent when the process is complete.” banner at the top of the screen.
This
can take awhile depending how much information is being transferred.
10. After
receiving the import course completion email from Blackboard,
click the refresh button on your browser or Blackboard to see the
transferred
materials (or log out of Blackboard and then back in again).
11. You
will
need to delete some duplicate buttons and rearrange them
to suite your taste.