Moving PowerPoint to Blackboard is a three step process. First you create the HTML version within PowerPoint. Next you zip all the files that this process creates into one file that can be uploaded. Lastly, the zipped file is uploaded and unpacked in Blackboard. Each step is explained as you go through this tutorial.
Converting PowerPoint to HTML | Zipping the Files | Uploading and unpacking in Blackboard

Once you have completed a PowerPoint presentation, save it as your normally would. This creates the original presentation that you can go back to and easily modify in the future.
Go to File/Save as Web Page...

This process is very similar to doing a Save As, but with some MAJOR exceptions. First, rather than creating a single file, it will convert your presentation into a "home" HTML file, and all the graphics and text from the slides will go into a folder. In a large presentation, literally hundreds of small files of code and images will be created. Therefore, it is sometimes easier to make a separate folder in My Documents where you want to keep this newly created web format. In this case a file folder called PowerPoint was created. Note that in naming your presentation, it is best to NOT use spaces. If you need a space, use an underscore ( _ ) instead, as in this illustration. Some servers will not allow spaces in names.Now, click on the Publish... button.

You will see a variety of options on the next creen that comes up. For most presentations, the default settings are just fine. Note that if you used the speaker notes area to annotate the presentation, you can have them show as the student views the presentation. You may wish to explore the Web Options... area if you so desire. This will allow some custom modification of the way the presentation appears. The defaults set in this area are fine if you wish to leave it alone. If you select Open published Web page in browser, you will go to a preview of the presentation automatically.
To finish the job of publishing, click the Publish button on this menu.

As you can see, a webpage and a file folder were created on your hard drive. In the case of this presentation, 113 files of various types were created and placed in the folder. This is why you saved the original version as a PowerPoint presentation. It is much, much easier to edit that file and publish the presentation again than to modify any of the files that have been created through this process.
When you are ready to post your presentation to the web, you will need both the .htm file and the file folder.
Blackboard will not allow you to move multiple documents simultaneously to your course unless they are zipped into one file. For most things, one file at a time is fine, but not in the case of PowerPoint for the Web. When you create the web version, you create a large number of graphics, text, and html files. These need to be zipped before you upload them.
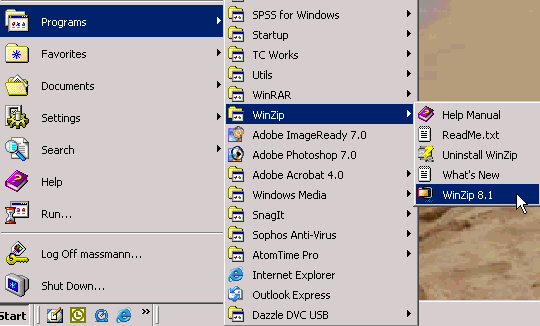
The first step in this process is starting the WinZip program. The IT department generally installs this program on any computer they provide. If it is not there, you can either contact them to have it installed, or go to TUCOWS, search for the program by name, and install it yourself. If it is already installed, you will find it by going to Start/ Programs/ WinZip/ WinZip 8.1. The process is similar with later version of WinZip.
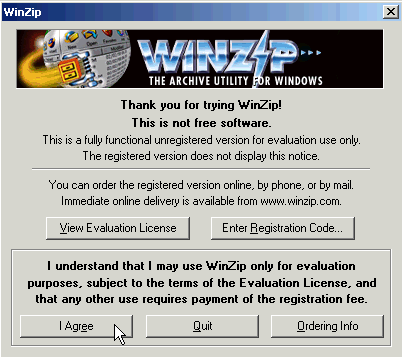
WinZip runs with a wizard to simplify the process. We are using the evaluation version for this example. Click on the I Agree button in the lower left corner of the screen to get started.
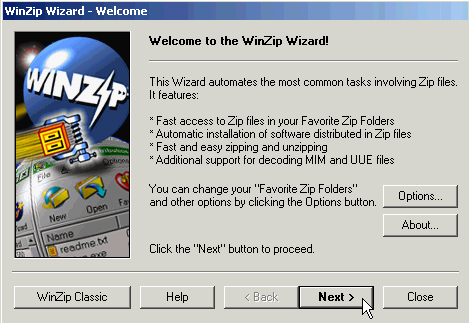
The next screen will allow you to customize the program if you so desire. This functionality can be found under the Options button. For general use, the default values work well. For our purposes, simply click the Next > button.
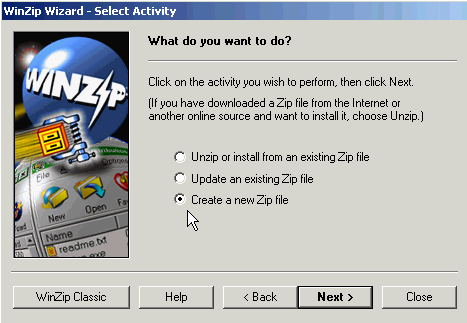
Here you are given a choice. The default is the first option, which assumes you are working with a zip file. This is not the case, since you want to create a zip file. Therefore, click the radio button in front of the third option, Create a new Zip file.
Once you have made this selection, click the Next > button.
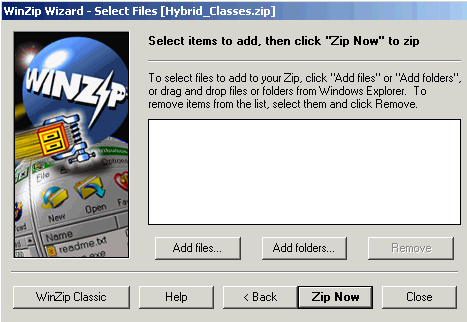
When you created your PowerPoint for the web version, you created both a single page and a file folder. You will need to add both to our zip file.
In WinZip you will add files or folders to be zipped. WinZip adds each type in a slightly different manner. Start with adding the file by clicking on the Add files... button.

Adding a file is easy. You are presented with a navigation format identical to opening a file for attachment in email, etc. Simply navigate to the file you want to open, highlight the file, and click OK.

Now you will see the one file you have selected in the white box in the center of the wizard screen. Our next step is to add the file folder of all the graphics and text to the zip file.
Click on the Add folders... button.
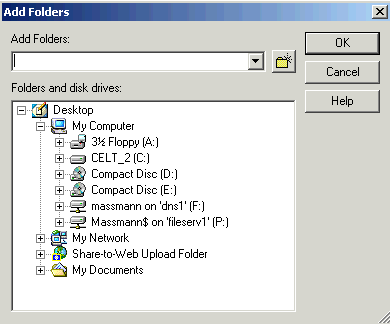
The interface for adding a folder is different than adding a file. You are going to have to chart a path to the folder using the interface to open existing locations on your computer. The first step is to find the hard drive for your computer. In this case, the hard drive is named CELT_2[C:]. Your hard drive will have a different name, but the [C:] will be your indicator you have found it. When you have, click on the + sign in front of it.

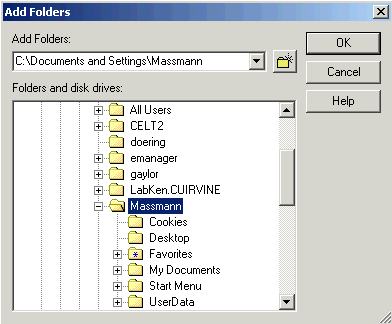
Now you will see the entire contents of your hard drive. A few items will be familiar, but most of the files are for operations that are handled by Windows or for the operation of programs. You are looking for the Documents and Settings file folder. When you have located it, click on the + sign in front of it.

Windows keeps a Documents and Settings folder for every user of your computer. You will probably not see as long a list as appears in the graphic, but there will be several users. You are interested in your Documents and Settings. It is generally identified by the login name you use to get into the campus network. Locate your file folder and click the + sign in front of it.
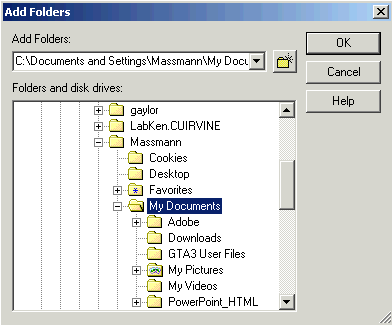
In the list under your user file folder, you will find a familiar file folder called My Documents. Click on the + sign in front of the My Documents folder.

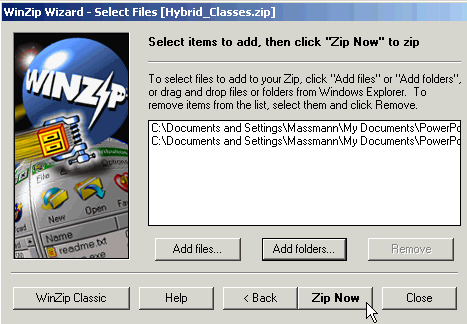
Now you should see two lines in the white space in the wizard. One is for the file you added earlier and the other is for the folder you just added. We're now ready to create the Zip file. Click on Zip Now.
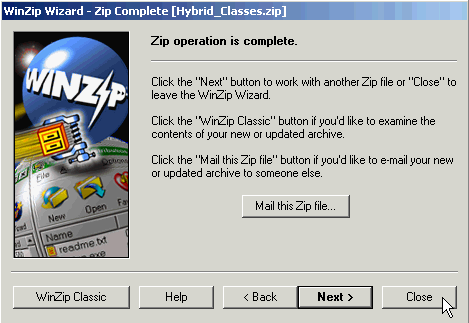
When the Zip file is done, you will have several options in the wizard. Since the file is ready for your use, click on Close to exit the program.
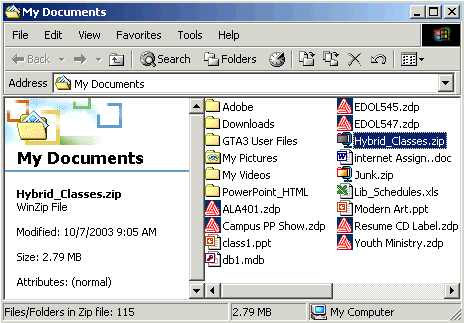
Now you need to locate the Zip file you created. By default, it should have been stored in your My Documents file. From your desktop, open the My Documents file. You will find the file in that folder after the list of folders. It will have a .zip extension. You will be using this file to upload your presentation to Blackboard.

Adding this zipped document is in many ways quite similar to how you add a Word document, a pdf, or any other document. First access the area where you want the PowerPoint presentation to be located. In this case, it is going into the Course Documents area, so click on the Course Documents link.
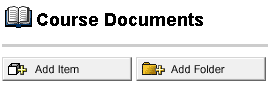
You can create a folder for all the PowerPoint presentations, or just create a link within an existing folder, or simply add an item. In this example, we will Add item, so click on that button.

In the line for specify your own name, insert the title of your presentation. You may wish to add instructional text similar to what you see illustrated. The presentation will be usable even if the elect not to use the full screen mode.
Incidentally, only in the full screen mode will animations or narration you have added be available to your students.
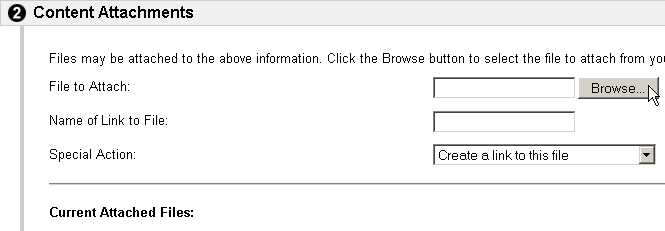
You will follow the same process you would normally use for uploading a file by browsing to where the file in located on your hard drive. Click the Browse... button.
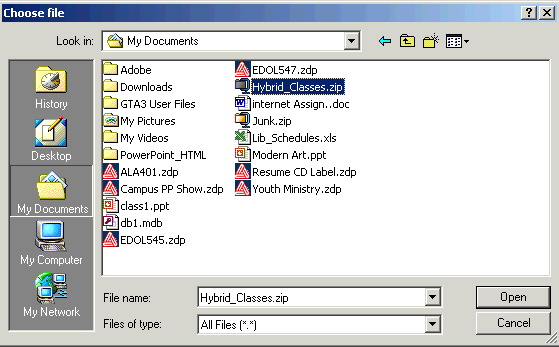
You are looking for the .zip file for your presentation. Find it, probably in the My Documents folder, and highlight it. Click the Open button.
Open is really a misnomer. You are selecting that file by clicking Open, not opening it for viewing right now.
In the Name of Link to File, you can insert the words you see in the illustration, the name of the presentation, or leave it blank. Leaving it blank will put the file name, along with the extension, which may be confusing to students.
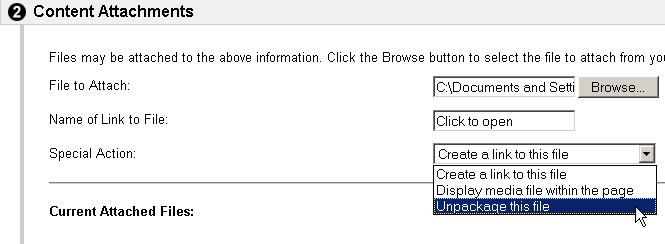
In the Special Action, scroll down to Unpackage this file. This is Blackboard's term for unzipping a file. In section 3, Options, the default options are fine. Now click the Submit button at the lower right corner of the page.
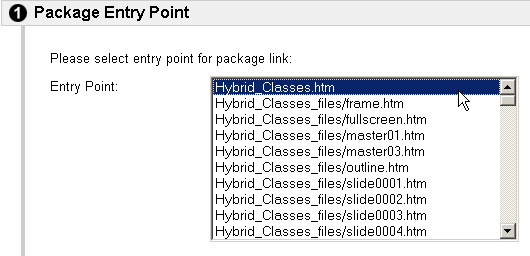
A little time may pass as the files are uploaded. You will eventually be asked for an entry point. This is the file that you added to the zip as a single file. It will end with .htm, and not be in the file folder you added. Most likely, it will be the first file on the list. Select this file by clicking on it to highlight it, and click on the Submit button.
![]() This is the Show Show icon
that was mentioned in step 3 above, where you made note of this feature
for your students. If you click on it, you will see the slide show in
full screen, and it will operate in the same way it does when showing
it from your computer to your class.
This is the Show Show icon
that was mentioned in step 3 above, where you made note of this feature
for your students. If you click on it, you will see the slide show in
full screen, and it will operate in the same way it does when showing
it from your computer to your class.