| PowerPoint Basics | |||||||||||||||
PowerPoint is a presentation package. It is used to design presentations that can be printed, made into overheads, or shown using a data projector directly from a computer. The basic idea is to present only the key points to your audience, filling in the details through your verbal presentation. Getting
Started | Changing Text and Alignment | Adding
a Slide |
|||||||||||||||
| Getting Started | |||||||||||||||
| 1 |
|||||||||||||||
| 2 |
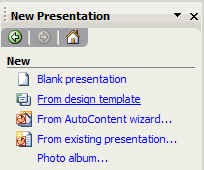
The program will default to a blank presentation. You can use prepared backgrounds called templates for your presentation. In the right column, click on New Presentation. This will bring up a screen that looks like the one below:
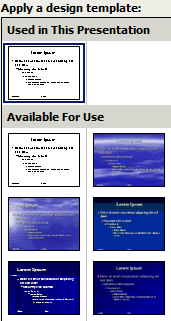
Click on From design template to see the template choices.
Double click on the one you want to use and it will appear in the main design window. |
||||||||||||||
| 3 |
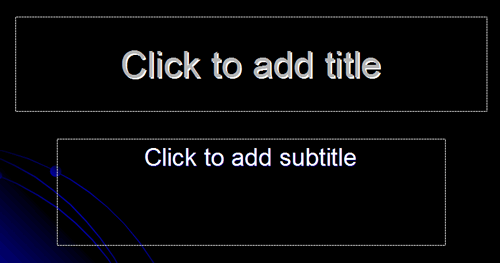
Since the first slide is automatically the Title Slide, simply leave this slide as is as far as layout. On the screen there should be two text boxes. They are defined by the dotted lines. Click the box before the one that says Click to add title. Type in the title of the presentation. Click in the other box. Type your name and course name. You have completed your first slide. Note, if you do not add any text to a box, the dotted line and the directions will not show when you present the slideshow or print the document.
|
||||||||||||||
| 4 | At this point you should SAVE your presentation. Go to File/Save As, give your presentation a name and save it to your disk. The process is identical to saving a Word document. After you add each slide, or more often if you wish, save the presentation. Nothing is more frustrating than having work lost because a computer decided to freeze. |
||||||||||||||
| Changing Text and Alignment | |||||||||||||||
| 5 | Much of the changing of text and alignment can be done from the tool bar pictured below::
The commands are very similar to those used to change text and alignment in Word. You can also highlight a section of type and use the drop down list of type styles to change the font (red box in the graphic), and the number drop down list to change the size of the type (green box in the graphic). The area in the orange box controls bold, italic, underlined, and shadowed lettering. The three choices to the right of the orange box will control alignment. The first one is for left justified, the middle for centered, and the right box is for right justified. The numbered items are explained below:
|
||||||||||||||
| Adding a Slide | |||||||||||||||
| 6 | Look in the right column at the bar near the top with the drop down menu. Click on the drop down menu and slide down to Slide Layout as pictured below:
|
||||||||||||||
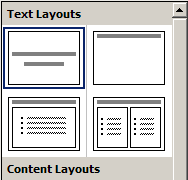
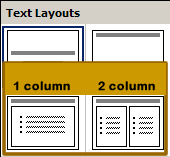
| 7 | You will now see a variety of choices. The first four are text layouts, the most commonly used slide layout options. The others below them have options for inserting graphics, movies, graphs, etc. For the purposes of this introduction, we'll concentrate on the first four only.
|
||||||||||||||
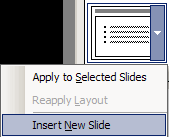
| 8 | No matter which slide type you select, inserting it is always the same. If you slide your cursor over the slide, you will see a bar appear on the right side. Click on it to reveal the menu, and slide down to Insert New Slide. A new slide of this style will be added.
Don't worry if you decide later you inserted the wrong type of silde. You can see that you also have an option to Apply it to an existing slide and change its format. In reality, you can add graphics, movies, new text blocks, or word art to any slide format. A new slide can also be added from the menu bar. Under the Insert menu, click New Slide. It will default as a single column, bullet slide. If it does not, you can use the Slide Layout column to select the bullet choice you wish to use. |
||||||||||||||
| Bullet Slides | |||||||||||||||
| 9 | Using the above procedure, insert either a one column or two column bullet slide.
A new slide can also be added from the menu bar. Under the Insert menu, click New Slide. It will default as a single column, bullet slide. If it does not, you can use the Slide Layout column to select the bullet choice you wish to use. |
||||||||||||||
| 10 | You now have a slide that will accept bullet points. The text box at the top of the slide is for the title for this slide. Enter a title into the box in the same way you entered text on the title slide. Now click in the bullet section and add the major points of your presentation. After each point press the Enter key to add another point. Using the Tab key inserts subpoints. They will have a different bullet and be smaller in size. If you use this feature, there is always some confusion as to how to make a new major, or first level, point. Look again at the same tool bar we discussed earlier in section 5. This is where option 5 on the toolbar will be useful. Clicking on the one pointed left will bring the cursor back to indenting a major point. The arrow pointed right will move the cursor to a subpoint. Remember, the strength of a presentation comes from brevity. Use as few words as possible. The words are just there to highlight your main ideas as you talk about them, not to have the whole speech on the slide. |
||||||||||||||
| Inserting Graphics | |||||||||||||||
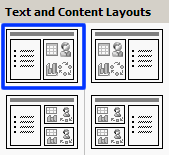
| 11 | The real strength of PowerPoint is using graphics to illustrate your ideas. Some say a picture is worth 1000 words, and in PowerPoint, this is certainly true. People will remember your ideas better if they can associate them with pictures. You can insert graphics or pictures from a file into PowerPoint. To do this add a third slide using the procedure described above. This time select the slide showing a title, bullet points in the left column, and a graphic in the right column, as illustrated in the blue box below.
|
||||||||||||||
| 12 | Below are the options for inserting media into the presentation:
The gray box has six options. They correspond to the positions shown below in the table:
Microsoft has some clip art built into the program. If you click on the upper right icon on the screen (the picture of the man), you will find the collection. Another option is to select Insert/ Picture/ Clip Art from the menu. If you use this message you may see a pop-up window that says Add Clips to Organizer. If this has not been done by someone else ahead of you, it is a time consuming activity. It would be useful for future use for you only if this activity is being done on your own personal computer. For this activity, it will be better to click on the later button on the menu and then double click on the picture of the man on the screen. If you have a picture or graphic in a separate file, use the Picture option to navigate to the graphic and insert it. |
||||||||||||||
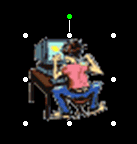
| 13 | Once it has been inserted, you can manipulate the size by clicking on the graphic so that "handles" show up on the graphic.
Click/hold and drag the corners to make the image larger or smaller while maintaining the proportions. Dragging the middle handles will distort the image. The green handle will allow you to rotate the graphic. If you want to move the graphic you can click on it so that the corners are highlighted, then, with the mouse arrow over the graphic, hold down the mouse button and drag the graphic around the screen. While still highlighted, the graphic can be moved small distances by using the up/down/left/right arrow keys on the keyboard. Be careful not to put the graphic on the edge of the slide. You need to leave about a 3/4" safe area around the border of the slide so nothing seems to be falling off the slide. |
||||||||||||||
| Running the Show | |||||||||||||||
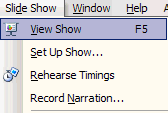
| 14 | There are several options for running the show. You can go to the main menu bar, select Slide Show / View Show or press F5. These two options will start the slide show from the beginning.
The other available option is to go to the bottom left corner of the screen and click on the icon that looks like a projection screen. This option will start the show from the slide you are on rather than the beginning.
If you want to stop the show, press Esc. |
||||||||||||||
| Printing | |||||||||||||||
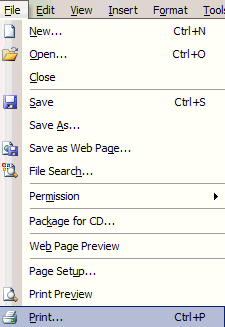
| 15 | PowerPoint allows for a variety of print formats. Starting the printing is exactly the same as in any Office application. Select File/ Print from the menu bar or click the printer icon on the tool bar.
|
||||||||||||||
| 16 | Opening the print menu creates a number of options. The two most commonly used options are in the lower area:
Under Print what: you have the option to print the entire slide full page (Slides) along with printing it as handouts. Use the drop down menu next to the word Slides above to find the Handouts option. Handouts allow you to print from 2 to 6 slides on a page. Printing in color will deplete ink supplies quickly as it prints the entire background in color. Grayscale will leave the background white, or at most, with a gray tint. |
||||||||||||||
| Miscellaneous Information | |||||||||||||||
| 17 | This covers only the bare basics needed to get started using PowerPoint. With a little exploring of the Help menu you can:
|
