PowerPoint:
Slide Transition and
Custom Animation
Transitions happen between slides. They can be disolve through black from one to the next, checkerboard pattern, etc.
Custom Animation deals with putting your bullet points up on the screen one at a time, and how they enter. They can just appear, fly in from the side or bottom, etc. They don't necessarily add to the content of the presentation, but rather simply make the presentation a little more interesting to view, thus better keeping the attention of your audience.
From the menu in the right column of the screen, select Slide Transitions.

The following menu will appear:
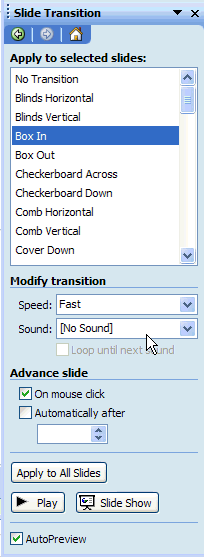
Highlight one of the options, such as Box In, and you will see the slide preview what you selected. You do not have an Apply button to check; just highlighting the choice will apply it to the slide. If you want to use the same transition between all slides, click on the Apply to All Slides option.
If you go to the Slide Sorter
view (View/Slide Sorter) or click on this icon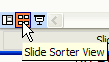 near the lower left corner of the screen you will see your slides displayed
in the following format:
near the lower left corner of the screen you will see your slides displayed
in the following format:

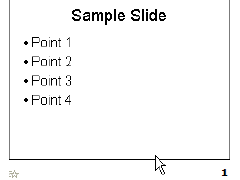
The littel star in the lower left corner indicates that a transition has been applied to that slide. Click on that star and you will see the animation previewed.
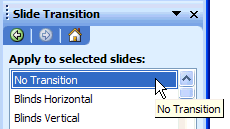
To remove a transition, you must be in the individual slide, not the Slide Sorter view. From the Slide Sorder view, double click on the slide you wish to change. If the program is not showing the Transitions in the right column, select Transitions (follow directions in step 1 above). Now slide the choice bar to No Transition at the top of the list of choices and the transition will be gone.
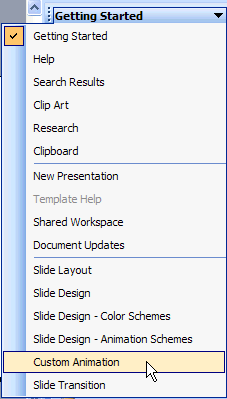
The following steps will allow formatting so that individual bullets show one at a time. In the right hand column of PowerPoint, click on the down arrow and go to the Custom Animation option:
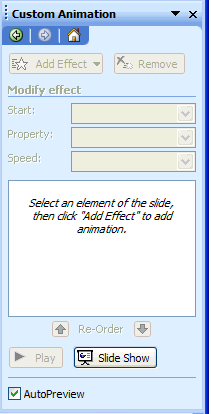
You will now see the menu below:
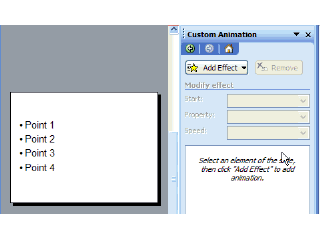
Put your cursor in the first bullet point. Click on Add Effect and you will see the options shown below.

You can see that besides Entrance, you have several other options. This tutorial will focus on Entrance, but all work in a similar manner. The only one that is a little tricky is Motion paths. If you are interested in this one, go to the Faculty Resources side of CELT. You will find a tutorial for Motion Paths there.
Here is an example of what you will see happening on the screen as the animation is applied:
You will notice that there are now numbers to the left of the bullet points. These numbers represent the order in which the animation will happen. Because we selected "on mouse click", the points will show only after you click the mouse when you show the presentation. See the illustration in step 10 below.

You can select any of the animations and modify it. In the illustration, animation 3 is selected. You can use the Change button to change the style or the Remove button to eliminate this animation. As you can see, you also have options for when it starts, direction, and speed. If you use the Re-Order option, you can move this item up or down in the sequence using the green up/down arrows.