Importing graphics
and pictures into PowerPoint can significantly increae the size of the
file. PowerPoint automatically keeps these at their original resolution,
which is most likely 300 dpi. This is great for printing large pictures,
but overkill for showing on a data projector, or even just printing handout.
By following the steps below, you can optimize the picture for the screen
at 96 dpi and reduce the size of the final file. The image you project
on the screen will not be compromised.
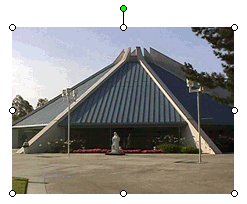
Click on any picture or graphic in your presentation. You will see the
little circle handles appear.
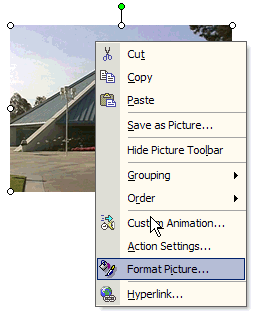
With the circle handles present, right click on the picture. Go
down to Format Picture and left click on that option.
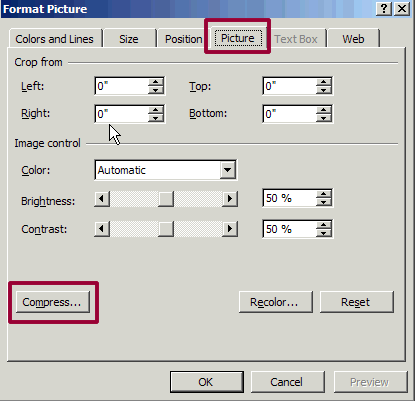
Click on the Picture tab along the top of the menu. Then click on Compress.
Depending on the version of PowerPoint, you may see a box that says something to the effect that compressing the files will reduce the quality. It asks if you wish to proceed. Click to continue. In the event that you are not happy with the results, you will still have the original presentation available because in step 5 you will be saving this compressed file under a new name.
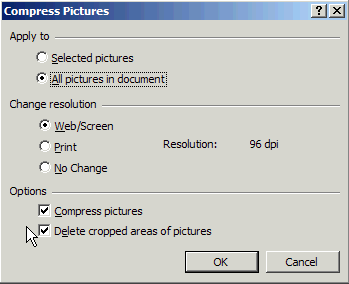
You will make several changes from the default that appears. First, under
Apply to, change the choice to All pictures in the document. This way
you will not have to repeat this for each individual picture.
In the middle section change, Change resolution, select Web/Screen. The print choice will reduce the picture from 300 to 200, but this is still much more than is necessary. You can see that the result of selecting Web/Screen is 96 dpi.
Leave both boxes checked under Options. This will also delete any areas of the picture you may have cropped when creating the presentation. The cropping tool just masks the area and doesn't delete it. If you are satisfied with the cropping you did, that data that is masked is no longer needed.
Click OK. Your cursor will become an hour glass as it completes the process. How long will it take? That depends on the number of pictures in your presenation. When it is done it will default to the screen shown in step 3 above. When this happens, just close the menu.
You are almost done, but there is the final Save as step. Why Save as rather than just Save? PowerPoint has the habit of saving only the new changes and keeping the old, even some deletes and resizing information. To make sure it is as small as possible, you need to do a Save as.
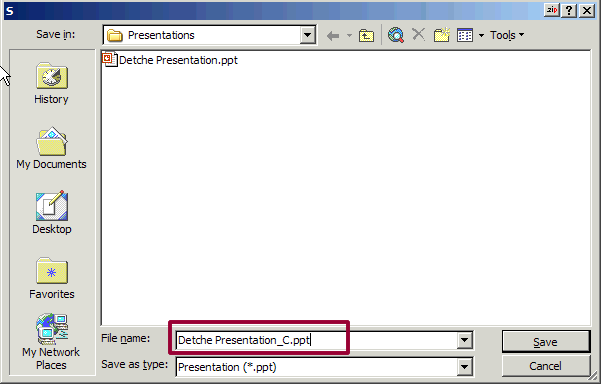
The easiest way to know which
is your original presentation and which has the compressed pictures, is
to add an _C at the end of the name of the compressed file. Make this
change, and then click Save.