This tool is NOT intuitive. You must establish grade columns before you can enter grades, and the My Grades tool page must be present so the students can see their own grades. If you plan to use the gradebook, please contact Paul Massmann to have the My Grades tool installed on your site. Here is how the grading system works.
Creating
Grade Columns | Entering Grades | Backing
up Your Grades
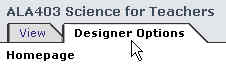
When you go into your class, make sure the Design Options tab is selected.
If you do not see the menu above, you will see the green triangle in the
left column next to a field box that says -designer links-. Click on the
green triangle to show the menu above.
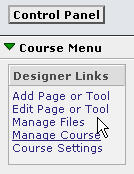
Click on the Manage Course option under Designer Links.

Click on the Manage Students title for the upper left set of options.
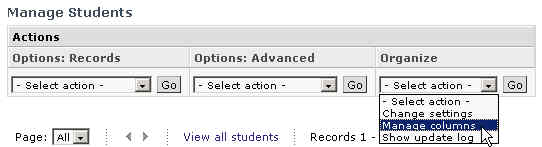
In the Organize column, select Manage columns and then click the Go box to the right of your choice.
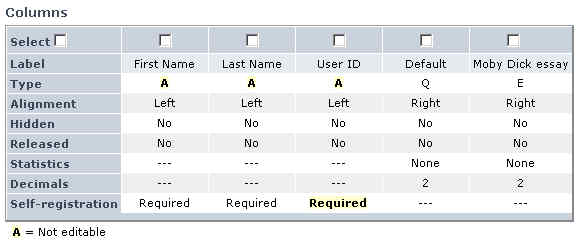
This will bring up the form you see above. If you see the Default column
or the Moby Dick essay, ignore them for now. Your system administrator
will remove them for you if you make your request known. They are sample
columns inserted by the software company.
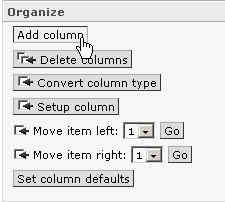
Along the right column of the page are all the controls for the columns. Under the Organize section, click on the Add column button.
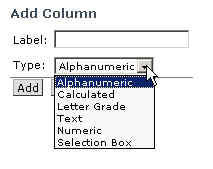
In the Label: area, put the name of the assignment. Try to keep it short, since the width of the column will be determined by the length of the label. You also have a pull-down menu for the type of grade. Since this tutorial is only covering the basics, only Alphanumeric will be covered.
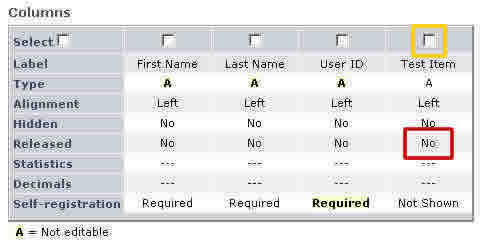
By default, the columns you create come up as NOT released (see red box
above). Even if you enter grades, your students will not see the grades
unless you release the column. To start the process of releasing the item,
click the box on top of the column you want to change (see gold box above).
Now look at the options on the right column. In the Release columns: (in
the blue box in the illustration) box, select Yes and then click on the
Go button. If you want to keep columns hidden until you enter grades,
simply don't release them until you are ready. You can create columns
on the fly as assignments are due, or all at one time at the start of
the course.
When you go into your class, make sure the Design Options tab is selected.
If you do not see the menu above, you will see the green triangle in the
left column next to a field box that says -designer links-. Click on the
green triangle to show the menu above.
Click on the Manage Course option under Designer Links.
Click on the Manage Students title for the upper left set of options.
If you created the column, you will find all of the options listed below the name of the column. If you created a test within WebCT, the option to Edit won't appear until after the test has been taken. If a grade is not present, you will see -- instead of a number or letter.
To initially add scores to the gradebook or edit the scores, click on the Edit link.

You can now enter the scores for the assignment. When you are done, click the Update button on the lower left of the columns. Unless you click this button, the scores you enter will not be recorded.
When you go into your class, make sure the Design Options tab is selected.
If you do not see the menu above, you will see the green triangle in the
left column next to a field box that says -designer links-. Click on the
green triangle to show the menu above.
Click on the Manage Course option under Designer Links.
Click on the Manage Students title for the upper left set of options.
From the Actions menu, select Download.
The default for downloading is a file with the records separated by a comma. Use the default choice and click Download.
Select Save to place the file on your hard drive.
Select the location on your hard drive where you want to keep the grades, and name the file appropriately. You may wish to change the word "class" to the course number as the default date is the date you are downloading the file. Keep it as a text file. Click Save
If you open the .txt file, you will see something that isn't very useful and hard to read. Instead, open Excel.
Go to File / Open
You will not immediately see the file. Go to Files of type: and select All Files, and it will show the text file you created during the download.

Select the file you want and click Open.

A text wizard will open. On the first screen, click Next.
In the Delimters box, Tab is the default and has a check in front of it. Uncheck the Tab option. Now click in the box in front of Comma, since this is the type of file you downloaded from WebCT. Now click Next.
Step 3 of the wizard will allow you to do some data manipulation, but isn't necessary for a .txt file from WebCT. Just click Finish.
Now you see a spreadsheet with the grades in Excel. You may need to adjust column width, etc. to make it print the way you want. You should go to File / SaveAs (see directions below - step 16 - to save it as Excel) before you make any modifications.
 Excel
will automatically try to save it as a .txt file. You want to save it as
an Excel file. Go to Save as type: and select Microsoft Excel Workbook (*.xls),
name the file appropriately, and click Save. Now you can add formulas, resize
columns, change scores, etc. and each time you save, it will be as an Excel
file. Unfortunately, you can not upload any changes you make back into WebCT.
Excel
will automatically try to save it as a .txt file. You want to save it as
an Excel file. Go to Save as type: and select Microsoft Excel Workbook (*.xls),
name the file appropriately, and click Save. Now you can add formulas, resize
columns, change scores, etc. and each time you save, it will be as an Excel
file. Unfortunately, you can not upload any changes you make back into WebCT.