 Blackboard
Tests & Surveys
Blackboard
Tests & SurveysBlackboard has several testing features. A test is just what it says. You can use a variety of types of questions (multiple choice, true/false, matching, short answer, etc.). Where the answer is a choice, the system will grade it for you and record the grades. You need to grade essay and short answer manually, and then adjust the grades in the gradebook.
It should be noted that there is a major difference between a Test and a Survey:
- Tests are graded and tied to an individual student.
- Surveys are graded and done anonymously. You can tell which students submitted the survey, but you can not identify which survey is from an individual studemts.
To create or deploy either, you follow the same steps. The difference is on the Assessment menu as to whether you select Test Manager or Survey Manager.
Pools are sets of questions from which you can create a quiz or survey. You can create a pool of 30 questions and have the system select a random 20 for a quiz, or have it select all of the questions in a pool. Each student will get a different assortment from the pool in random order. You can create a midterm or final by selecting a random number or specific questions from the pools for each chapter. Pools also have the advantage of being able to be copied to a new course or recycled course from semester to semester. Pools are covered in the link called Blackboard Pools on the CELT site.
Creating a Test

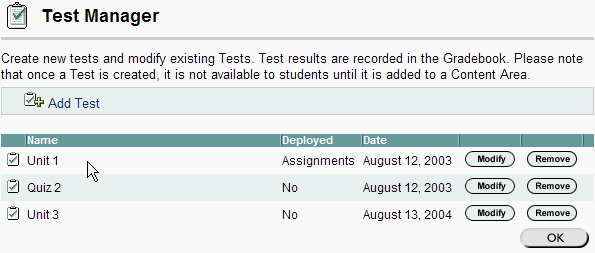
From the Control Panel, click on Test Manager in the Assessment area.
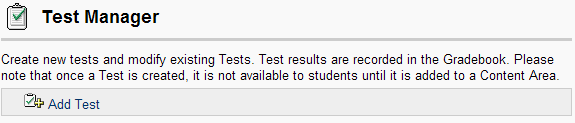
Near the top of the page, you will see the Add Test button. Before you click it, read the information above the button. This is different than in previous versions. Later in this tutorial you will cover making the test available to your students.
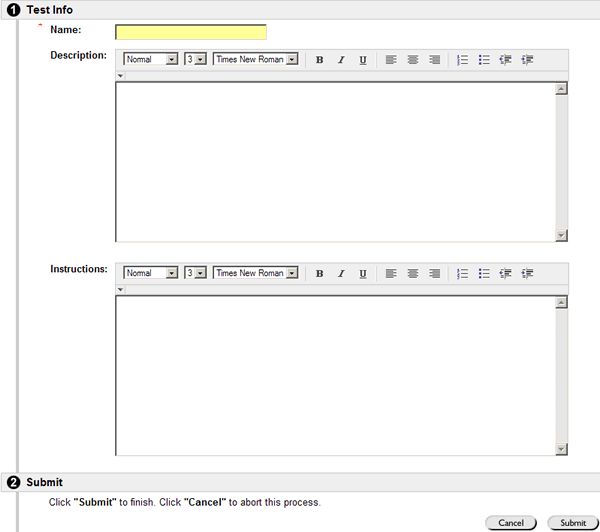
The first screen will ask you to name the test. Use a system that makes sense to how you teach. You may test on chapters or units, so name the test accordingly. You can, but do not have to, add a description of the materials covered in the test. This may help you identify it later. The instructions are for the students. You may leave the area blank if you wish. Once you have entered the information, click Submit to continue.
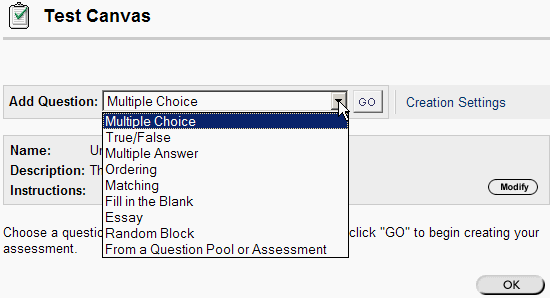
You have a variety of question types to select from. You will be presented with this option for each question you wish to add, so you are NOT selecting one type for the entire quiz. You could make this one Multiple Answer and the next True/False, etc.
- The difference between Multiple Answer and Multiple Choice is that you can have more than one correct answer for a Multiple Answer. For example, they could be asked to select the two most relevant characteristics of a concept out of the five you present in a Multiple Answer question.
- Ordering will have the student put the choices in the correct order based on time, steps in a process, etc.
- True/False is just what is indicated.
- Matching will allow you to create a list to be matched with definitions, etc.
- Fill in the Blank is a little more difficult to use. You need to provide all the correct answers, as well as spelling variations that might occur including caps or non-caps answers, if you wish the system to grade the item.
- Essay will require grading steps on your part.
- Random Block and Pool will be covered under creating question pools in another tutorial
For this tutorial, click on Multiple Choice, and then click on Submit.
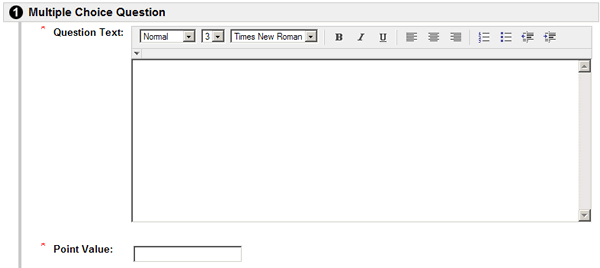
In section 1, type in your
question. You must give the question a Point Value in the supplied box.
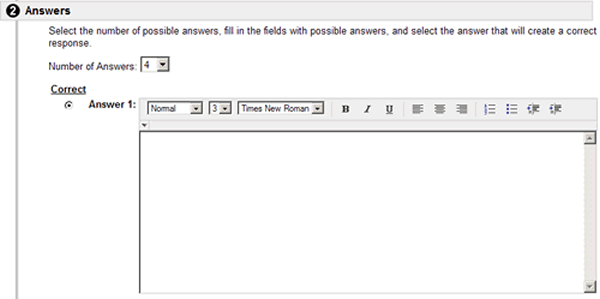
In section 2, you will be supplying the four (or more) choices for your question. Fill in each box with one answer. Click the radio button in front of the correct answer.
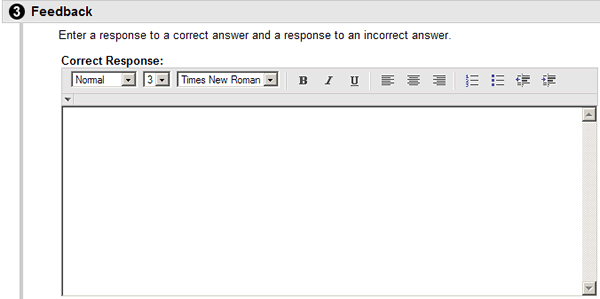
In section 3, you have the option
to enter feedback for a correct or incorrect response, or for both. This
feature will give the student immediate feedback as the test is taken.
When you have completed the blanks, click Submit in section 4.
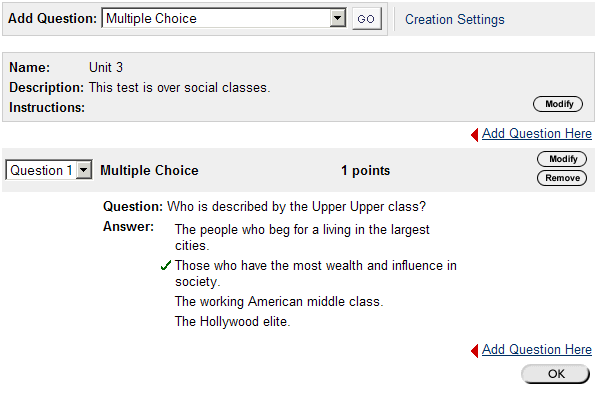
You will then see the question on the screen. You can modify it or remove it if you see errors. If you want to add another question, you can click the Add Question Here link or select the type at the top of the screen and click Go.
When you have completed the set of questions, or wish to stop, click the OK button shown in step 9. You can always go back and add more questions later. Clicking the OK button will bring up something similar to the screen shown above.
 |
One major change is that you can now Modify a test while it is deployed. This allows you to correct spelling errors, wrong choices for the correct answer, etc. without wiping out all the scores of the students who have taken the test. |
Previous versions of Blackboard allowed you to deploy a test from the Assessment area. This is no longer the case.
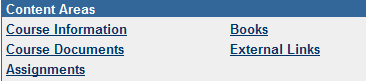
A test can be deployed in any of the content areas. Click on the area you wish to use. For purposes of this tutorial, it will be deployed in the Assignments area. All areas work the same way.
![]()
You will see a menu bar at the top. You can create a Folder first if you want to put all the tests into a folder. To deploy the test as an item in the Assignments area, just click on the Test icon.
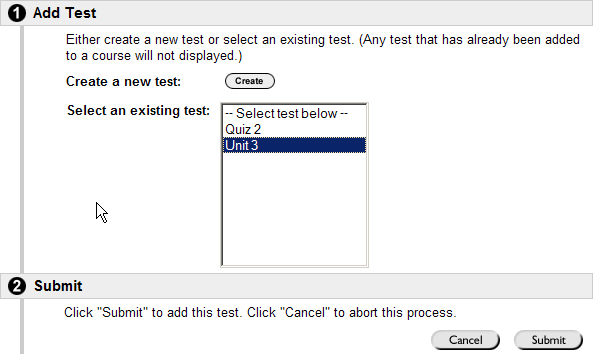
Highlight the item you wish to deploy and click Submit. You will see a message that the test was successfully added. Click OK.
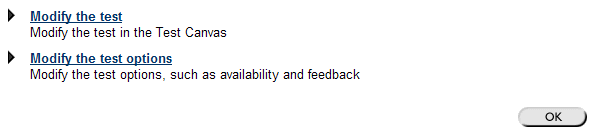
So far you have placed the test in the Assignments area, but your students will NOT yet see it and NO Announcement has been generated. This is much different than previous versions. Click on Modify the test options link.
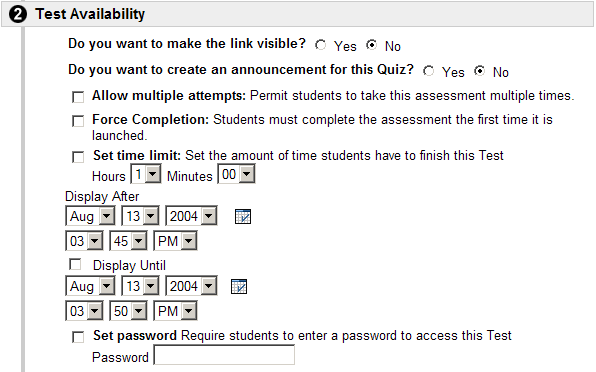
Under section 2, you are most concerned with the first two options. If you want the students to see the test, you must click YES to the first question. If you want an announcement on the home page of the course, you must change the second question to YES. The default on attemps is one. You can change that and a number of other options on this page. When you have made your changes, click Submit at the bottom of the page.
Removinging a Test
You remove a test from student access by going to the Control Panel and clicking on the Content area where the test was deployed. NOTE: This will not remove it permanently from the test bank, but only from view of the students.

Next to the test you have two options. Click on Remove to remove the test.